| NetSuite Expertise | CPAs and accountants who live inside NetSuite daily, not generalists who learned it last year | General bookkeepers with basic NetSuite exposure and limited configuration knowledge |
| Chart of Accounts Setup | Rebuilt and structured around your business model, revenue streams, and reporting needs | Default out-of-the-box setup that doesn't reflect how your business actually operates |
| Month-End Close | Disciplined close calendar, automated reconciliations, financials delivered on time, every month | Close drags into week three, reports arrive late, and follow-up emails go unanswered |
| Multi-Entity & Consolidation | Clean intercompany accounting, FX handling, and real-time consolidated reporting across all subsidiaries | Manual consolidation workarounds that break under pressure and produce unreliable roll-ups |
| Revenue Recognition | ASC 606-compliant deferral schedules configured to your contracts, auditable from day one | Inconsistent revenue treatment with manual adjustments and reporting gaps that surface at year-end |
| A/P, A/R & Payroll | Fully integrated workflows across payables, receivables, and payroll, tied directly to NetSuite's GL | Disjointed systems with error-prone manual syncing and no clear approval hierarchy |
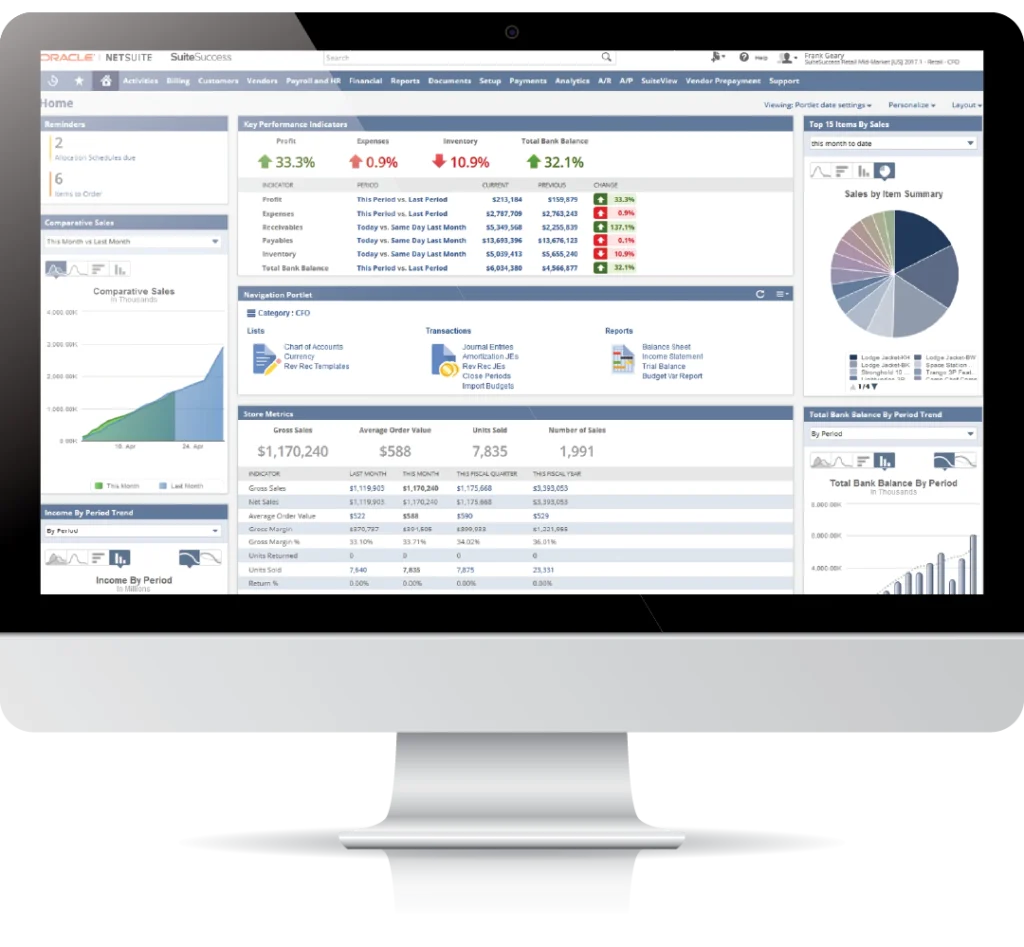
| Reporting & Dashboards | Custom dashboards built for decision-makers, cash position, margins, burn, and A/R exposure in real time | Generic NetSuite templates with limited customization and poor visibility for leadership |
| Audit Readiness | Documentation, journal entries, and reconciliations are maintained year-round, not scrambled at year-end | Missing backup, vague entries, and rushed prep when audit season hits |
| Integrations | NetSuite connected with Salesforce, Stripe, Expensify, Gusto, and more, no manual imports | Third-party tools are siloed from the finance system, creating duplicate work and data gaps |
| Communication & Access | Dedicated lead with Slack/email access, proactive updates, and fast response times | Slow ticket systems, rotating contacts, and responses that arrive after the damage is done |
| Pricing | Fixed, transparent monthly pricing, no surprise invoices | Hourly billing or vague retainers that creep up without explanation |
| Cleanup & Recovery | We specialize in fixing broken implementations, messy books, and inherited messes | Most firms won't touch a cleanup; they want a clean setup handed to them |


My main problem always has been to know my accurate profits & this is precisely what Ledger Labs helped me with. They went through my entire supply chain costs, my monthly operational expenses, and COGS and got me the correct costing of my goods and the cost of running the business. Now I know how much I need to sell & at what price I should sell it to be profitable.
Ariel Robinson CEO & Founder