
Whether you’re a small business owner or a large company, customer invoices play an essential role in your everyday workflow.
No matter if you’re using Odoo or any other accounting software, you can’t overlook its importance.
You might think they’re simply a way for clients to pay for your products and services but there’s so much they’ve to offer.
First and foremost, changing the appearance of invoices can elevate your company’s professionalism.
We’ll explore several other benefits of personalizing invoices in this article. Besides, we will also discuss the steps through which this customization in Odoo can be achieved.
Let’s get started.
Understanding the Odoo Invoicing Module
The invoicing module in Odoo is a convenient and well-organized section of this ERP software.
You can create, customize, and send your invoices online effortlessly with the help of the Odoo invoicing module.
Furthermore, a business can make its work procedure more efficient by integrating it with other important modules in the platform.
For example Sales, Inventory Valuation, Purchase, and many more.
Some of the essential features of the Invoice Odoo module are:
- Create well-organized customer invoices within a few steps
- Print hard copy of invoices to be sent via post or email
- Use International Commercial Terms or Incoterms to ensure a business has standard contract terms
- Manage recurring invoices
- Apply vendor bill to customer invoice in Odoo
- Allow customers to pay the bill in multiple currencies.
- Create an informative reporting session
Navigating to the Odoo Invoicing Module
If you are using Odoo ERP software for the first time, you might not be aware that the platform provides some of its apps for free. Odoo invoicing is one of them.
Recommended: Netsuite Implementation Guide
To start using this module, you have to:
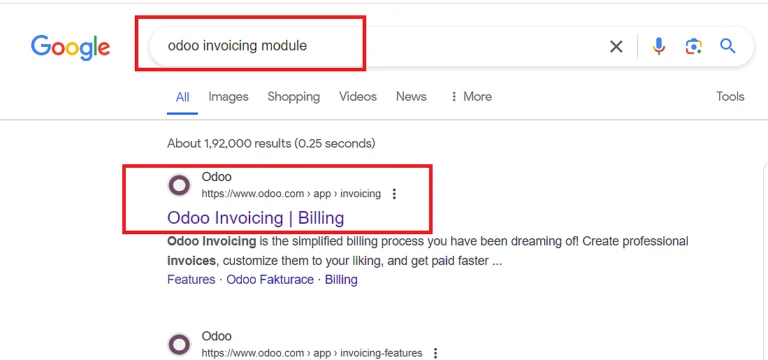
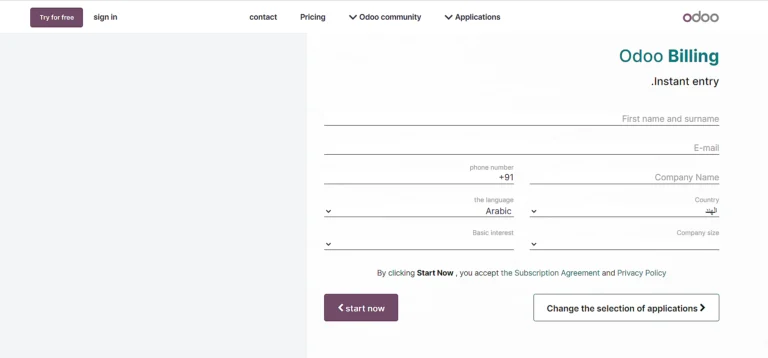
1. Type “Odoo Invoicing Module” in your preferred browser.
2.Click on the “Odoo Invoicing | Billing” link on the SERP.
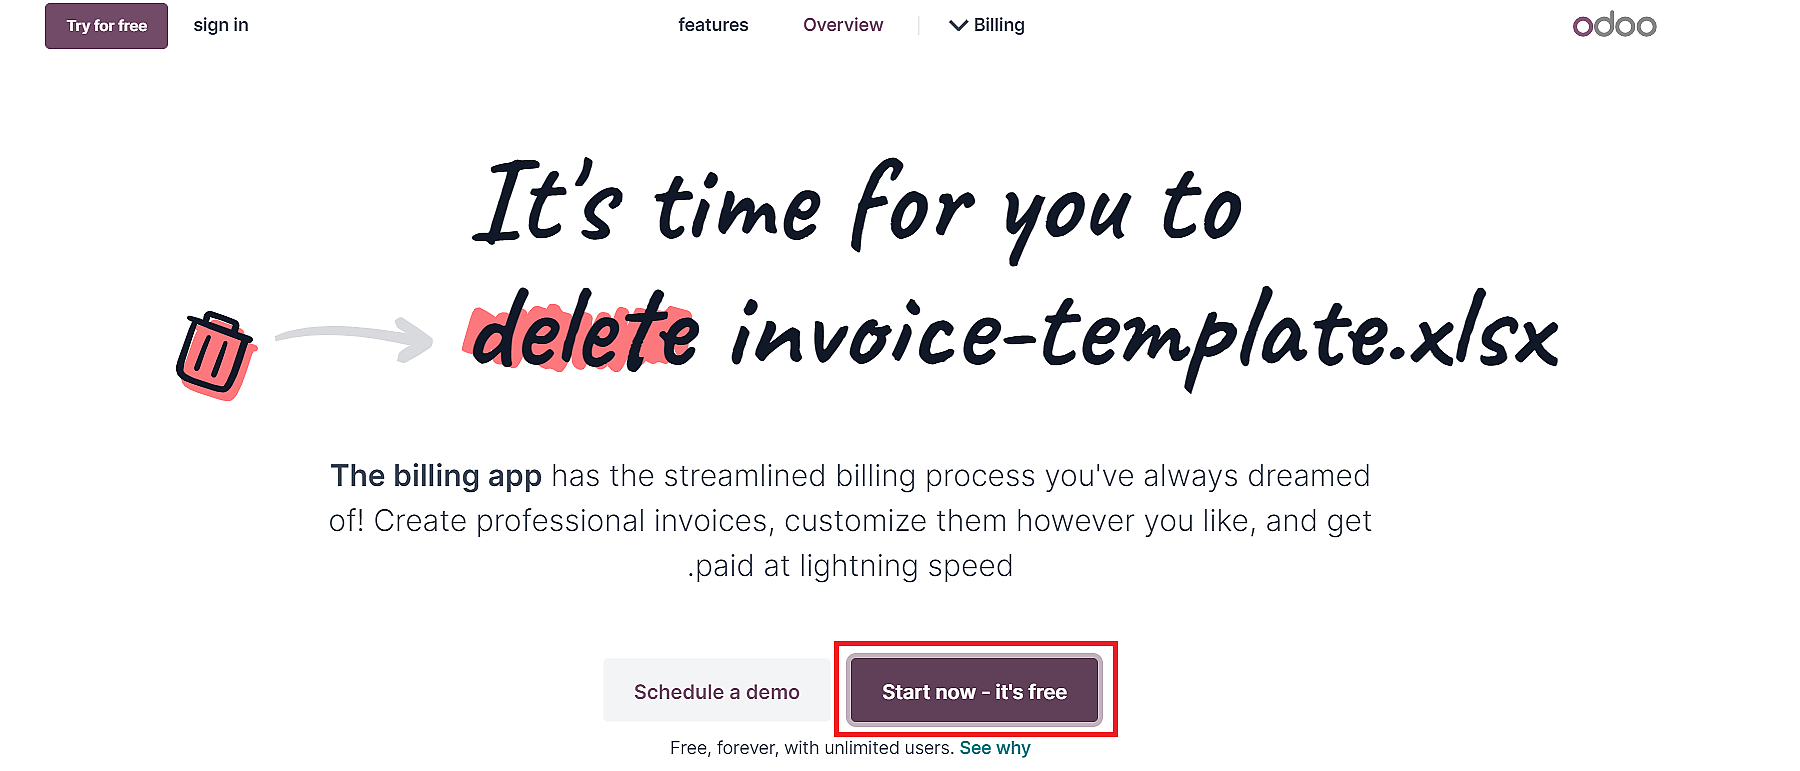
3. On the next window, press the “Start now – it’s free” button to get started.
4. Then, add the important details in the form. Once filled press the “Start Now” button.
In this app, some basic functions are available that you can use for Odoo invoice customization. They include:
- Accessing general settings
- Changing the font and layout
- Adding the company logo in different colors
- Incorporating tagline or other company details
- Customizing the footer
- Choosing page layout for printing purposes
- Adding a background image
Although these are fundamental options, you can create a strong impression among your customers. We’ll discuss some of its advanced features as well later in this article.
Steps for Odoo Invoice Customization
As explained previously, businesses can Odoo customize invoices in various manners. You can simply add your business logo or incorporate a tagline; it’s up to your preferences. Let’s look at the steps to do so.
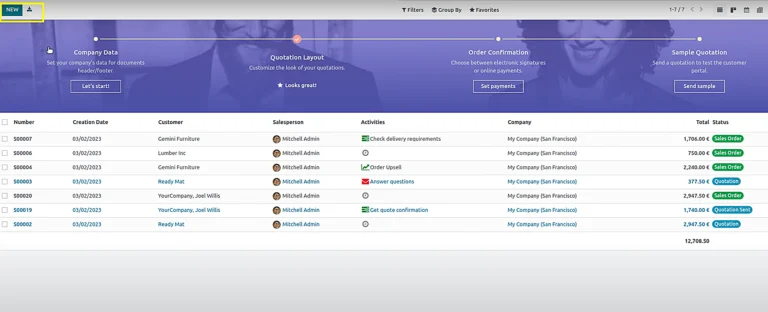
1. First, you need to select any pre-existing invoice templates. For that,
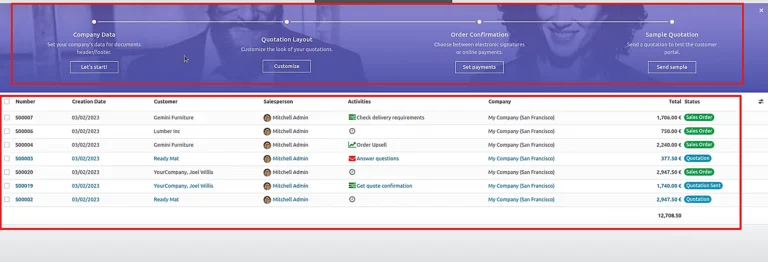
- a) Click on the “Sales” module on the Odoo Dashboard.
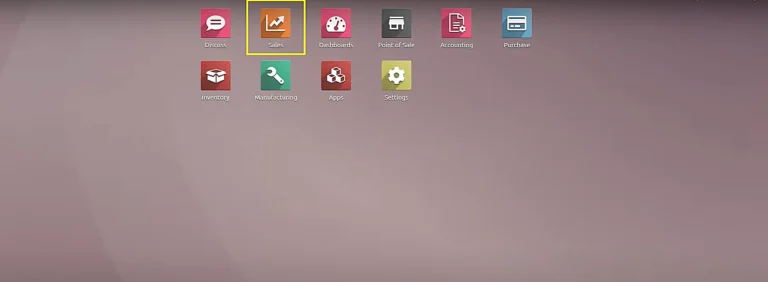
- b) In the next window, the onboard of the “Sales” module will be opened.
- c) Here you can see options like Company Data, Quotation Layout, Sample Quotation, etc.
- d) Apart from that, you’ll also see a list of pre-built invoices.
2. The next step is to edit the invoice template Odoo using its built-in editor. To be able to access the editor:
- a) Click the “Customize” button under the “Quotation Layout” tab.

- b) Once you select “customization”, a new wizard will open.
- c) This built-in editor will allow you to personalize the invoice.
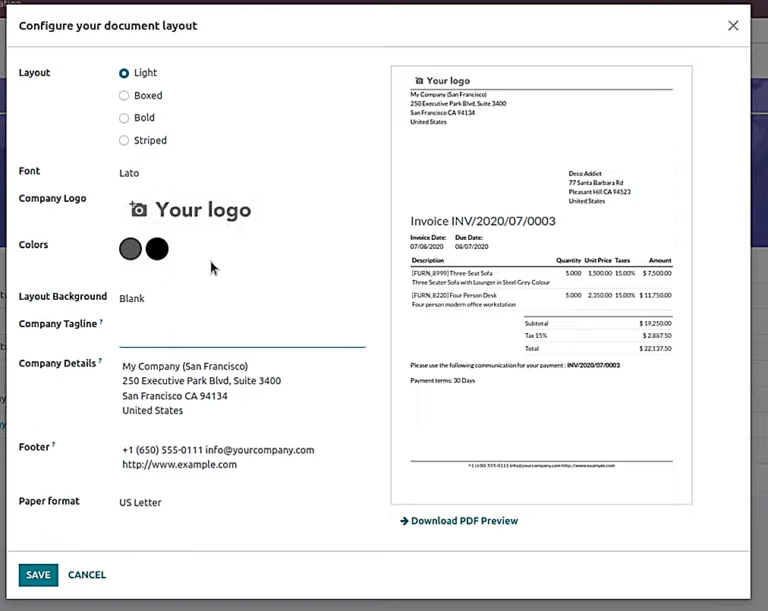
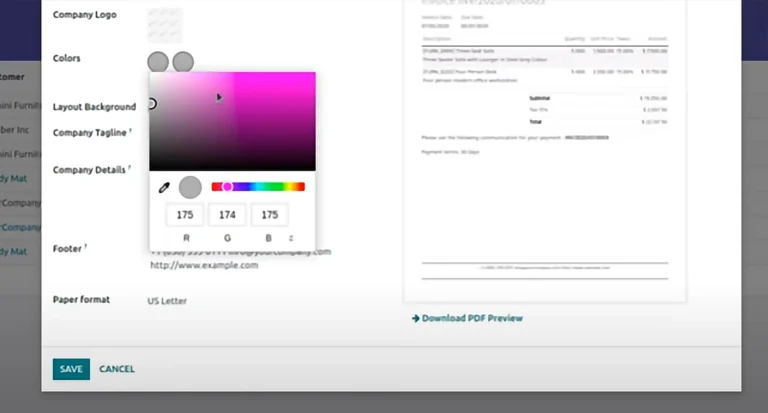
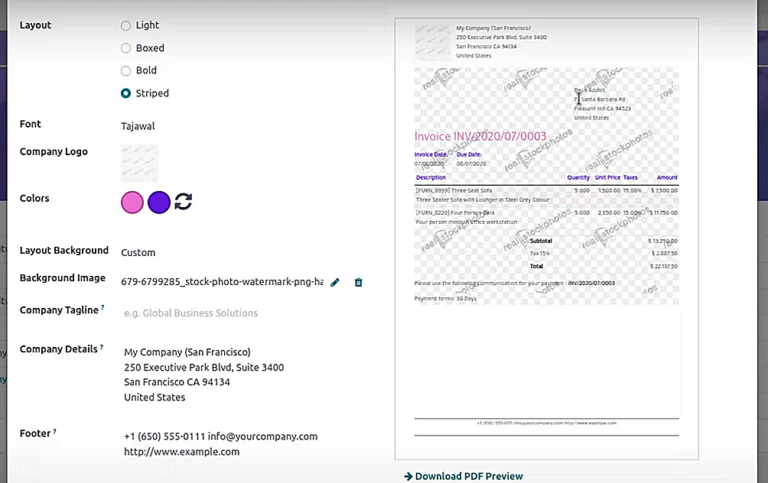
3. Modifying layout, fonts, colors, and other design aspects
- a) Personalize the template as you like, for starters, change the layout to boxed, light, bold, or striped.
- b) Click on “Font” to select the desired font type.
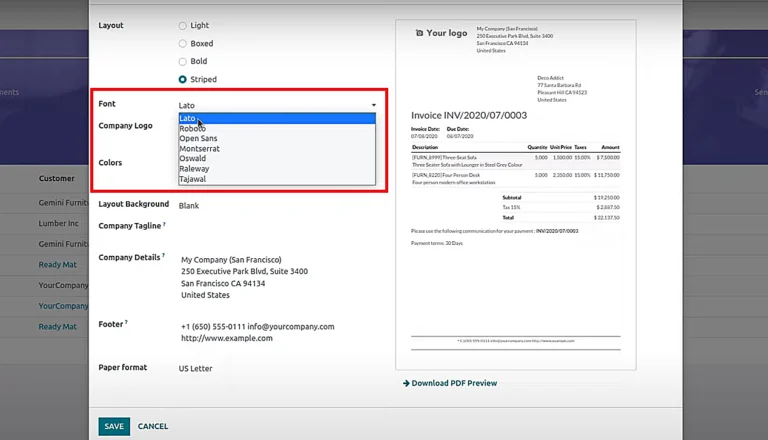
- c) You can also update the colors as required.
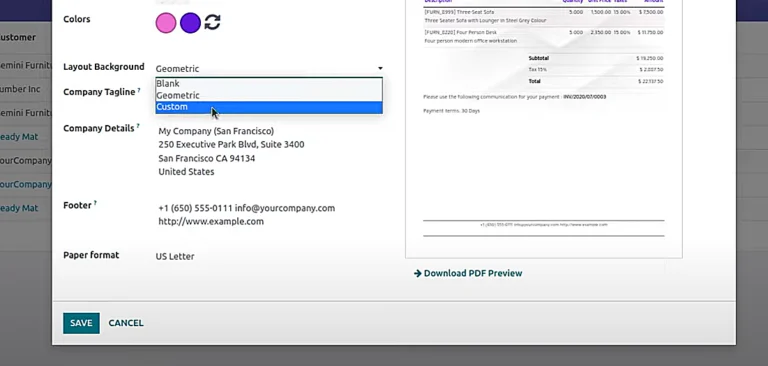
4. Changing the layout background.
- a) Click on the “Layout Background” option.
- b) Select “Custom” from the drop-down menu.
- c) Click “Upload Your File”. This image will act as a watermark for invoices.
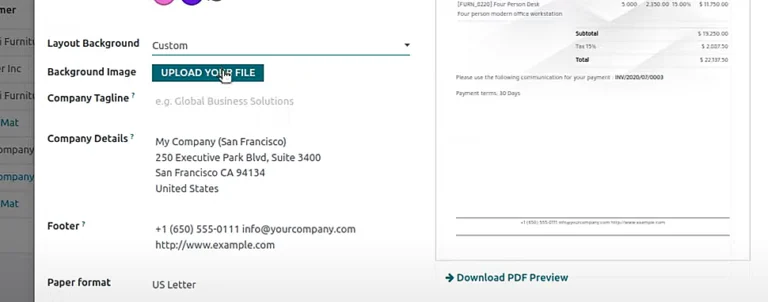
- d) Select the file you want to upload.
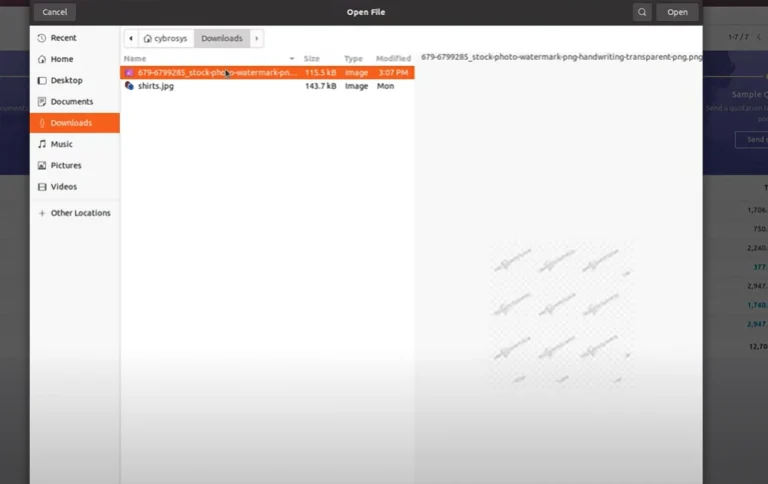
- e) Then, click on “open”
- f) Once done, you can see how the invoice will look with the watermark.
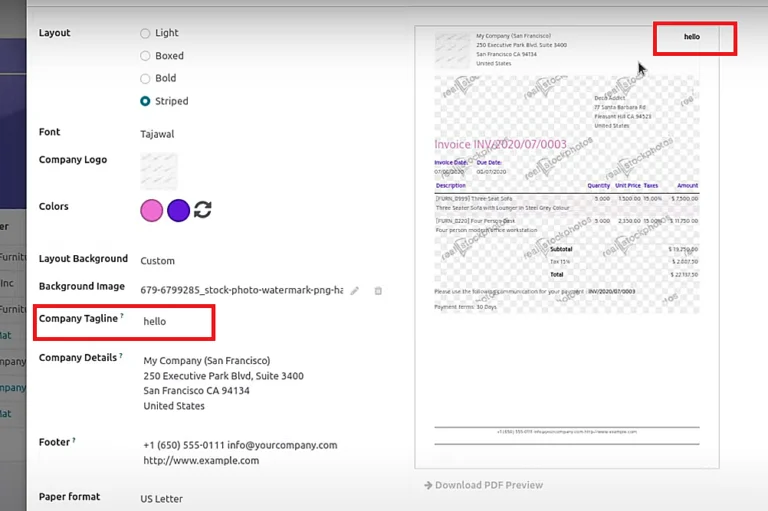
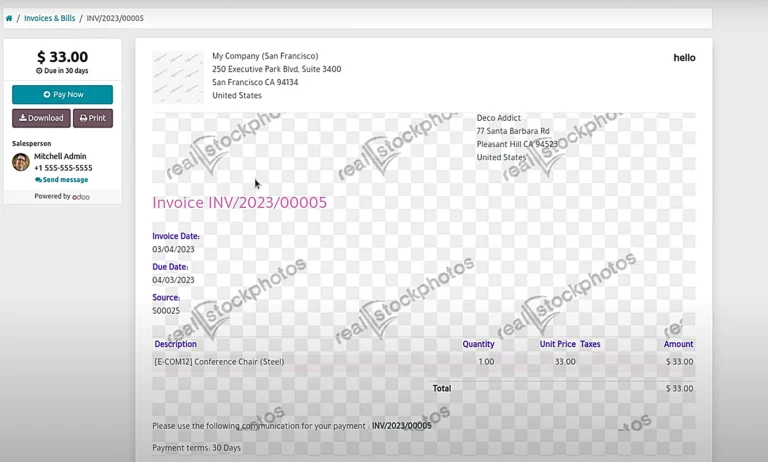
5. Odoo Customize Invoice layout also enables the users to set a company logo, contact information, and other branding elements. In the image below, you can see an example of “hello” being used and highlighted as a tagline, for your reference.
6. Once you make all the changes per your requirements, click “Save”.
7. If you want to see how the edited invoice will look, then
- a) Go back to the “Sales” Onboarding window.
- b) Click on the “New” button.
8. On the form, add customer name, product, etc.
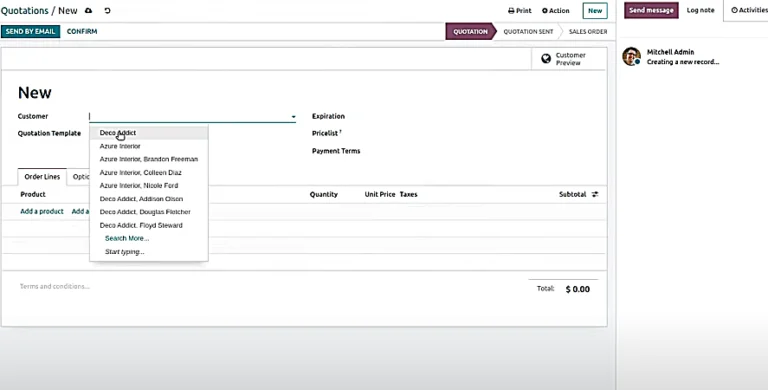
9. Click on “Confirm”.
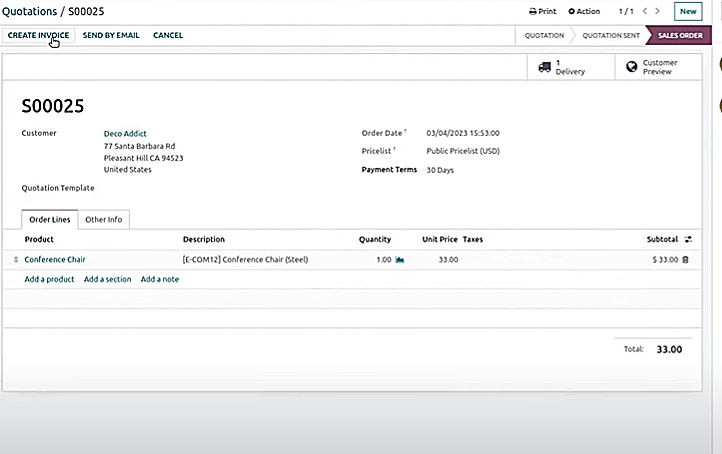
10. After confirming, select the “Create Invoice” tab
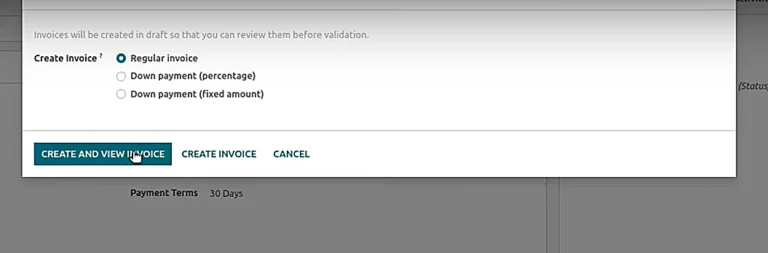
11. Choose “Regular Invoice” and press the “Create and View Invoice” button.
12. Make the required changes manually so that the software realizes the product is shipped and delivered. Accordingly, the bill can be generated for the customer.
13. Once the changes are made, click on “Preview”.
Adding Custom Fields to Odoo Customize Invoices
Odoo custom invoice template is an answer for all those firms looking for a comprehensive invoice form. Businesses that want to add custom fields to their invoices can purchase this Odoo application. The module is so easy to use that you wouldn’t have to depend on any tech professional for customization. Some of its prominent features are:
- Add a custom field for suppliers or customers in the Odoo custom invoice template wizard
- Easy to create
- Use it for multiple purposes such as domain/search option
- Put the custom field anywhere in the form
Facing issues with Odoo Customization Invoices
Connect with our Odoo support group!
Accessing Odoo Custom Invoice Template
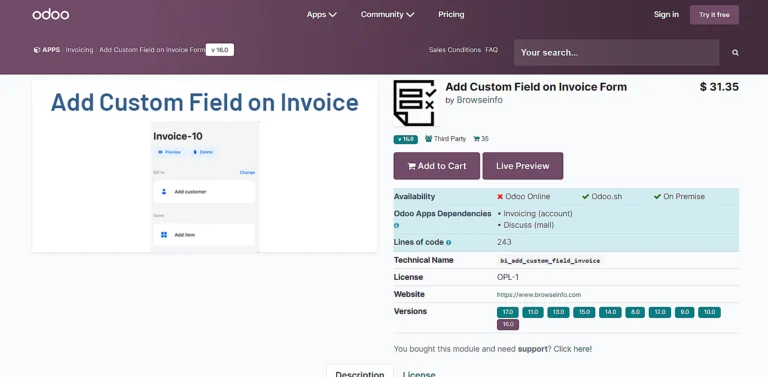
As mentioned above, you have to purchase this module from the Odoo app store. You can simply follow the below-mentioned steps:
1. Type “Add Custom Field on Invoice Form” on your preferred browser (Yahoo, Chrome, Bing, etc.). Make sure to include the version that you’re using.
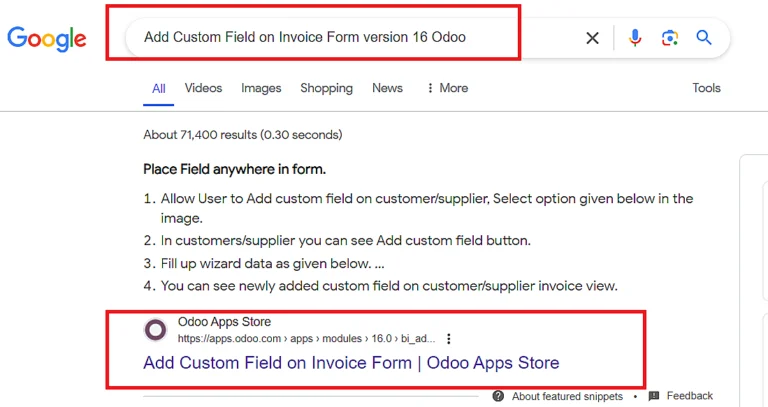
2. Click on the Odoo Apps Store link on the Search Engine Results Page.
3. Purchase the product after adding it to the cart.
4. Once purchased, go to “Settings” in your Odoo Dashboard.
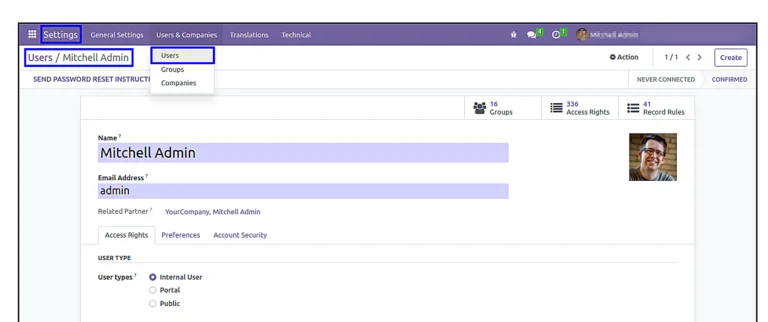
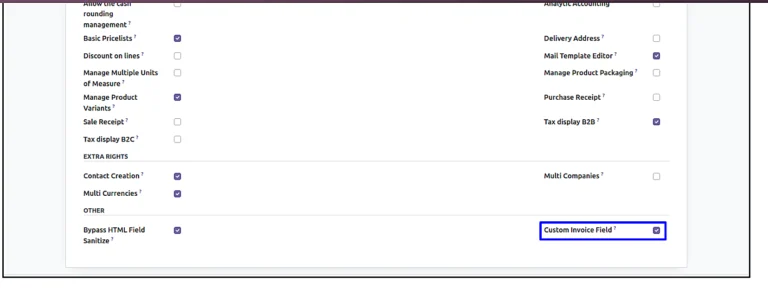
5. Scroll down to the bottom of the page to enable the Odoo Custom Invoice Template.
6. After that, you can see the “Add Custom Field” button on both supplier and customer invoices. For example, for the customer invoice section (see the image below):
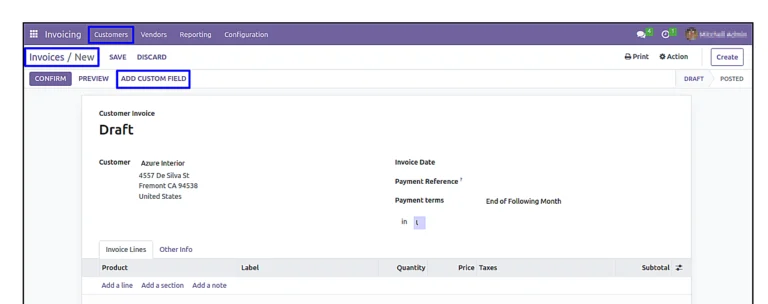
7. Once you click the “Add Custom Field” button, a wizard will be opened where you can add fields according to your business requirements. This way, you can make an advanced Odoo Customize Invoice for your business.
Understanding Odoo Add Custom Field Wizard
Take a look at how you can access the custom field wizard to create a unique Invoice layout:
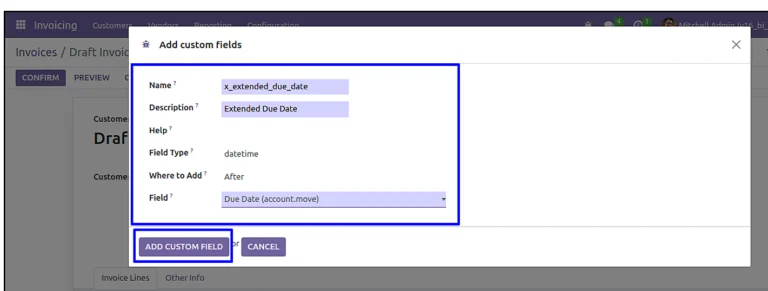
- Field Name: The name for your new field that will be stored in the Odoo database.
- Field Label / Description: What you’ll see as a label on the details form.
- Field Help: A description for users to understand what the field is about.
- Field Type: The kind of data the field will hold (like numbers or text).
- Where to Add: Choose where you want the field to appear – either before or after another field.
- Field: Specify the field you want your newly created one to come before or after.
Some of the examples of useful custom fields for invoices:
- Project Code: If you want to associate certain invoices with a specific project, this field is quite beneficial. With project code, a business can track revenues and expenses related to a specific project.
- Customer Reference: When an organization adds a “Customer Reference” field in an invoice, they can easily track customer’s information during follow-ups.
- Payment Terms: One of the most useful fields you can add to an invoice Odoo is specifying the terms for payment. By setting “Payment Terms”, a business can have more clarity on the generated revenues.
Integrating Payment Methods and Terms in Odoo Invoicing Template
So far we’ve discussed the basics for Odoo invoice customization like adding logos or custom fields. Now, let’s get into some of its advanced features. To begin with, you can integrate payment methods or terms in Odoo Invoicing Template. Earlier we stated how payment terms can simplify a business’s process to receive customer payments. Odoo can automatically notify them of the time they need to pay their vendor i.e. your organization. As a result, they can plan their payments and proceed with the purchases accordingly.
Configuring Payment Methods in Odoo
You can access this feature from the software’s Accounting module.
1. In this module, click “Payment Terms” from the drop-down menu under the Configuration tab. Once done, you will be directed to the page.
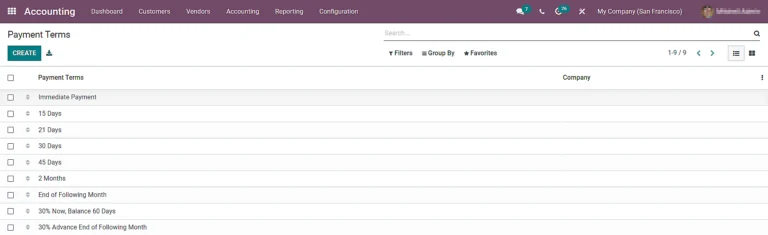
2. Click “Create” if you wish to set up a new payment term in the Odoo customize invoice layout.
3. Name the payment term and add a brief description for the same which will appear in Odoo invoicing.
4. Choose the type (Balance, Percent, or Fixed Amount).
5. Set the amount or percentage accordingly.
6. Calculate the due date by entering the number of days and selecting the period.
7. Save the new payment term after filling in all the required information.
Adding Payment Terms and Conditions to Customer Invoices in Odoo
To assign payment terms to customer invoices, you have to:
- Go to the “Customers” tab in the platform.
- Select the customer for whom you want to set the newly created payment terms.
- Under the Sales & Purchase tab, choose the appropriate payment term from the Payment Terms field.
- Save the changes.
- The payment term will only be applied to the new invoices that you’ll create for that customer.
Setting up Automatic Payment Reminders
Another way you can customize the invoice template Odoo is by applying reminders for automatic payment. For that,
- Navigate to the Accounting Module.
- Open the customer invoice where you want to set up automatic payment reminders.
- Create a Payment reminder template by mentioning the necessary details.
- Schedule the date/time for sending reminders to customers.
- Assign policies for Payment Reminders, as required.
Implementing Localization and Legal Requirements in Invoice Odoo Template
Odoo allows businesses to operate within different markets seamlessly. Its Localization capabilities ensure your invoices comply with local laws. As a result, you can generate accurate financial reports and manage business transactions efficiently. That too without compromising on the best business practices or legal requirements.
Using the Custom field wizard, you can add tax information, VAT numbers, and other legal requirements to an Odoo Customize Invoice template. However, before that you have to configure taxes with the Odoo accounting app. Additionally, a business can create Odoo customized invoices for international clients by integrating a field for multi-currency transactions. You can enable foreign currencies from the configuration option in the “Accounting” module.
Advanced Odoo Invoice Customization Techniques
Now, let’s take a look at some more advanced settings for Odoo invoice customization. These options can further improve your brand identity and simplify the order procurement to payment-receiving workflow. One of the most used features that businesses often use is to customize Odoo invoice numbers and sequences. Let’s take a look at the steps to do the same:
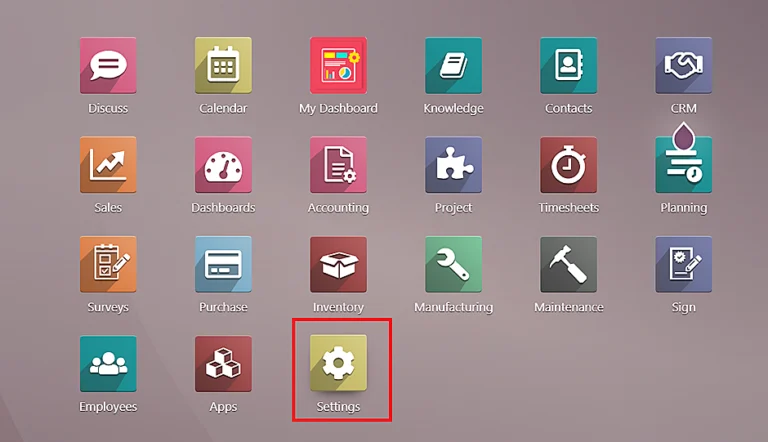
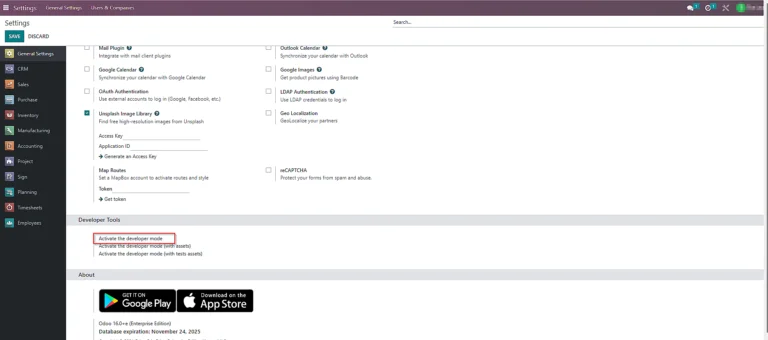
1. First, you need to activate Odoo’s “Developer Mode”.
- a) Go to the “Settings” app in the Odoo dashboard.
- b) In the next window, scroll down to locate Developer Tools.
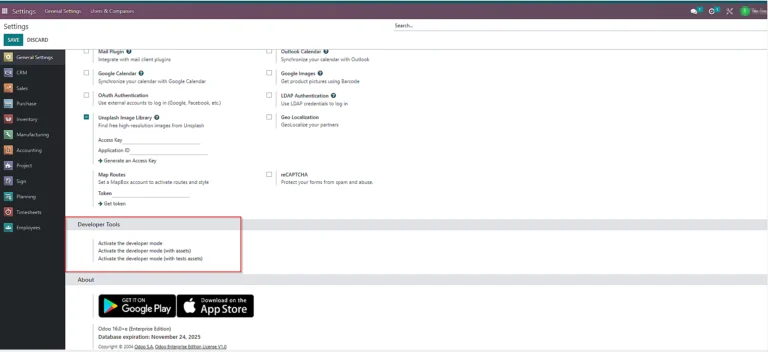
- c) Then, click on “Activate Developer Mode ”(With Access)
2. Once the Developer mode gets activated, you need to create a new sequence.
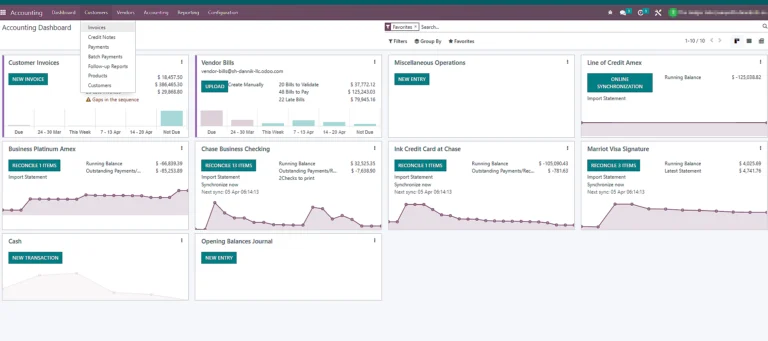
3. For that, go to the “Accounting” module on the Odoo Dashboard.
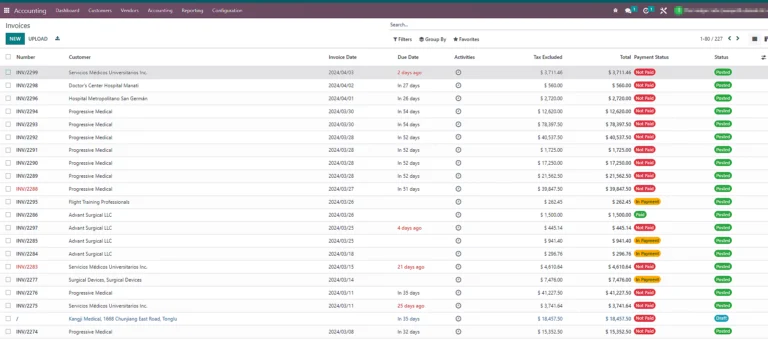
4. To look at an invoicing sequence, click on “Customers” and then select “Invoices”.
5. In the Invoice list view, select the latest invoice that has been generated.
6. Then, click on “Action”> “Resequence” (Please Note: This option will be only seen in the developer mode).
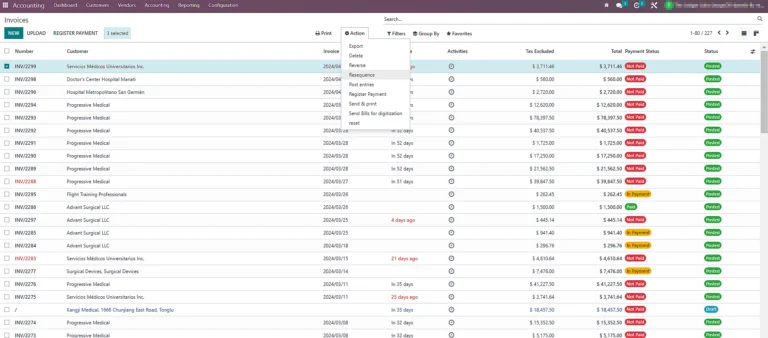
7. Once you click on it, the resequence window will appear.
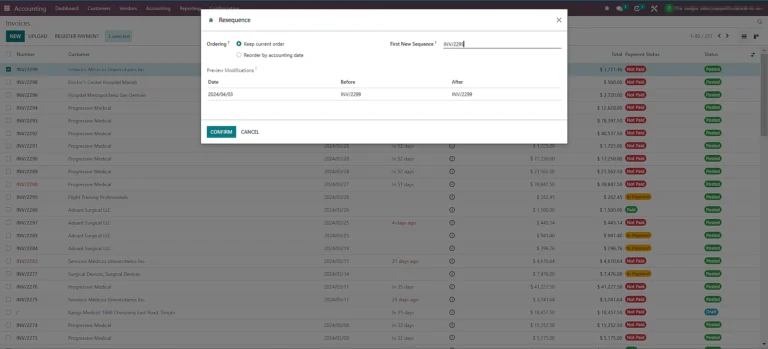
8. Change the number of invoicing on the “First New Sequence” field.
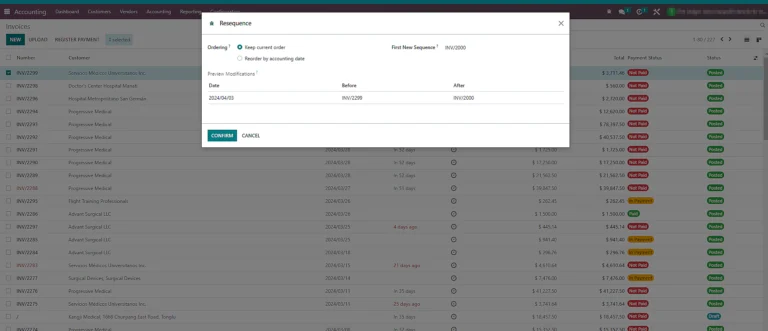
9. Then, click on “Confirm”
10. Check & verify on the list whether the new sequence has been created.
11. Create a new invoice to witness a new sequence that has appeared on the invoice.
12 Click on “Save” once you generate the invoice.
Testing and Reviewing Odoo Customized Invoices
So, all the steps we’ve mentioned above for the Odoo Customize Invoice process can streamline your organization’s key workflows.
However, it is mandatory to perform a test to verify whether all the personalization settings are working according to expectations or not.
If you’re wondering why it’s necessary, then here is the explanation:
- Ensure that the Odoo Customized Invoice layout appears in the correct format.
- Check whether the new template reflects the business personality and style
- Verify whether the features are added according to the specific projects.
- Minimize errors when you send the final Odoo invoicing to the customers.
- Help to make adjustments based on the testing results.
- Provide the feasibility of revising the custom invoice template Odoo like adding payment terms or tax details.
Read More : Odoo vs NetSuite: The Complete Guide
Best Practices for Invoice Odoo Customization
Before we end the blog, here’s a question: do you think it is easy to customize an invoice template in Odoo? We bet our explanation has made it simpler for you to understand the concept. No matter how unchallenging it seems, there are certain best practices that you need to consider while creating an Odoo Customize Invoice. The reason is it will ensure that the process becomes efficient and effective, and produces high-quality results for you.
To help you out, we’ve jotted down some tips for an efficient Odoo invoice customization workflow:
- Customize invoices based on business needs and requirements.
- Make use of Odoo’s built-in editor wizard to simplify the process.
- Apply vendor bill to customer invoice in Odoo by linking both invoices together.
- Involve finance and design teams to understand their requirements and feedback.
- Test customized invoices in Odoo to identify any issues.
- Make improvements as per the results of the test and trial.
- Document customization workflows for future reference.
Common pitfalls to avoid when customizing invoices in Odoo
While customizing Odoo invoicing, businesses may encounter some issues that can impact the efficiency of the process. Although you may face certain pitfalls, it is necessary to know the ways to address them properly. They can be:
- Over-customization: Do not overdo it as it may complicate the invoicing process or can lead to inconsistencies throughout.
- Ignoring standard practices: Make sure the Odoo custom invoice templates adhere to standard invoicing practices, that comply with legal requirements.
- Lack of testing: Skipping thorough testing of customized invoices can lead to inaccuracies. So, ensure your organization tries the procedure before sending it to the customers.
- Inadequate training: It is also necessary to train users on how to use and manage customized invoices within Odoo. By doing so, you’ll avoid a lot of discrepancies in the future.
Final Thoughts
Customizing the Odoo invoicing procedure is not at all complicated. Although you can use the software’s pre-designed template, creating a personalized one has its own charm. We hope the steps mentioned above for creating an Odoo customize invoice will provide you with the necessary guidance. Nonetheless, always follow the best practices to form a new template so that you can make this process sustainable. Most importantly, you should try the newly created template before sending it out to your customers.
If you face any difficulties, Odoo provides further support through its free online documentation and training resources. You can gain further knowledge regarding Odoo invoice customization using these resources. However, if your business needs customized support, contact the Odoo experts at The Ledger Labs. We will get in touch with you instantly and solve your queries.